ArgoCD Quickstart | GitOps with ArgoCD Kubernetes

If it isn't apparent, ArgoCD is a tool used for continuous deployment.
Argo makes it easy for teams to manage objects deployed in their Kubernetes clusters via the source control management tool of their choice.
This is a crucial component of GitOps where what’s in the repo is what’s deployed, making your teams codebase the single source of truth.
Think of it as a connection from GitHub (as an example code repository) to a Kubernetes cluster running your services, that's it!
An ArgoCD agent deployed in your cluster connects from said cluster to your source control system, continuously checking what Kubernetes manifest are in the repository and deploying them accordingly (in ArgoCD terms syncing). This "sync" could be triggered manually or automatically creating a truly autonomous solution for software deployments. More on this later.
This guide is intended for proof-of-concept or lab demonstrations only and not recommended as a playbook or example for production.
Use the following as a quick example.
.png)
- Repository. Your organization uses a central Github repo to hold all the teams code, including Kubernetes manifests and Helm charts. You receive a ticket to decrease the number of Pods in your Kubernetes Deployment of nginx from 5 to 4.
- Merge. After branching and receiving all the needed approvals, you merge back into the main branch.
- Out of Sync. ArgoCD in this example has been configured to track the main branch for its Kubernetes objects. Argo notices that in the main branch, the number of replicas has changed. The tool will go into an out of sync state, triggering an automatic update in its attached Kubernetes cluster.
- Sync cluster. Our cluster has modified the Deployment to match what's on the main branch, increasing the number of pods returning to a synced state. What's in GitHub matches what's deployed in the cluster.
Now with that in mind, let's get our hands on keyboard and establish ArgoCD in a cluster of our own. For this example I've spun up a k3d cluster on my local machine and used the Quiet Storm GitHub repository account to hold my YAML files for deployment in the cluster.
1. Install k3d | Create Kubernetes cluster
k3d is a wrapper of k3s, simplifying the deployment of single and multi node clusters with Docker.
* this guide assumes Docker and the kubectl command line tool have already been installed
brew install k3d
This quick-start was completed on a MacBook, please use other available options for your environment.
To move quicker I'll add an alias for the kubectl tool (save time):
alias k=kubectl
This way we don't have to type kubectl, just the letter k!
Then we'll create a cluster with k3d, I gave it an example name. Name your cluster whatever you'd like:
k3d create cluster example-cluster
Once the clusters been created, you should be able to run kubectl commands against it. Run the following:
k get node
The resulting output (node name) should begin with k3d, followed by whatever you named it in the above creation command.
* If you're having issue, first place to troubleshoot would be your Kubeconfig. k3d should have generated one in your home directory, in the .kube folder. Troubleshoot the config file here.
2. Install ArgoCD
The ArgoCD team has great documentation, and their Getting Started Guide will easily deploy ArgoCD into our k3d cluster.
We won't be using the ArgoCD CLI in this guide so complete steps 1, and 3 in the linked guide. I completed them as followed:
First create a namespace for Argo:
k create namespace argocd
Then install the manifests that will make up our containerized ArgoCD. This is their link, it may not exist if you're reading in the future.
kubectl apply -n argocd -f https://raw.githubusercontent.com/argoproj/argo-cd/stable/manifests/install.yaml
(From ArgoCD's documentation: This default installation will have a self-signed certificate and cannot be accessed without a bit of extra work. Do one of the following:
- Follow the instructions to configure a certificate (and ensure that the client OS trusts it).
- Configure the client OS to trust the self signed certificate.
- Use the --insecure flag on all Argo CD CLI operations in this guide.
Lastly port forward the ArgoCD API service to port 8080 on your local machine
k port-forward svc/argocd-server -n argocd 8080:443
3. Prepare Code Repository
For this guide I used GitHub as my code repository, complete the following with your own GitHub account or any repo you prefer.
- In the GitHub UI you select Repositories, then New
- For our quickstart, make the repo Public (not advised for production use, just for a quickstart and testing)
- Name it to your liking. We named ours qs-argo.
- Create Repository
- Create a folder in the repository (we named ours qs-server) and placed the below Deployment file (named ours qs-deployment.yaml) in the folder.
apiVersion: apps/v1
kind: Deployment
metadata:
  name: qs-nginx
  labels:
    app: nginx
spec:
  replicas: 5
  selector:
    matchLabels:
      app: nginx
  template:
    metadata:
      labels:
        app: nginx
    spec:
      containers:
      - name: nginx
        image: nginx:latest
        ports:
        - containerPort: 80
If you're unfamiliar with Kubernetes Deployments, read about them here.
4. Create App with UI
The ArgoCD API server can be accessed in your browser at http://localhost:8080
You should be at a login screen. The default username will be admin, and the password can be found as a secret in the cluster. When we deployed ArgoCD earlier, a Kubernetes secret holding the password was generated along with the other resources that make up the application.
Access the password in your terminal with following command:
k get secret argocd-initial-admin-secret -n argocd -o yaml
The resulting output should have a data field with a password key nested inside. Login with the password.
Once in the UI, select the New App button. A window should appear looking for app configurations. We entered the following:

- Application Name: A name for our ArgoCD application
- Project Name: A way to group ArgoCD applications. As we haven't created one in this guide, we'll keep default
- Sync Policy: ArgoCD is able to sync changes on its own or manually. For our purposes we will leave this as Manual so we can see the cluster become out of sync after we make edits

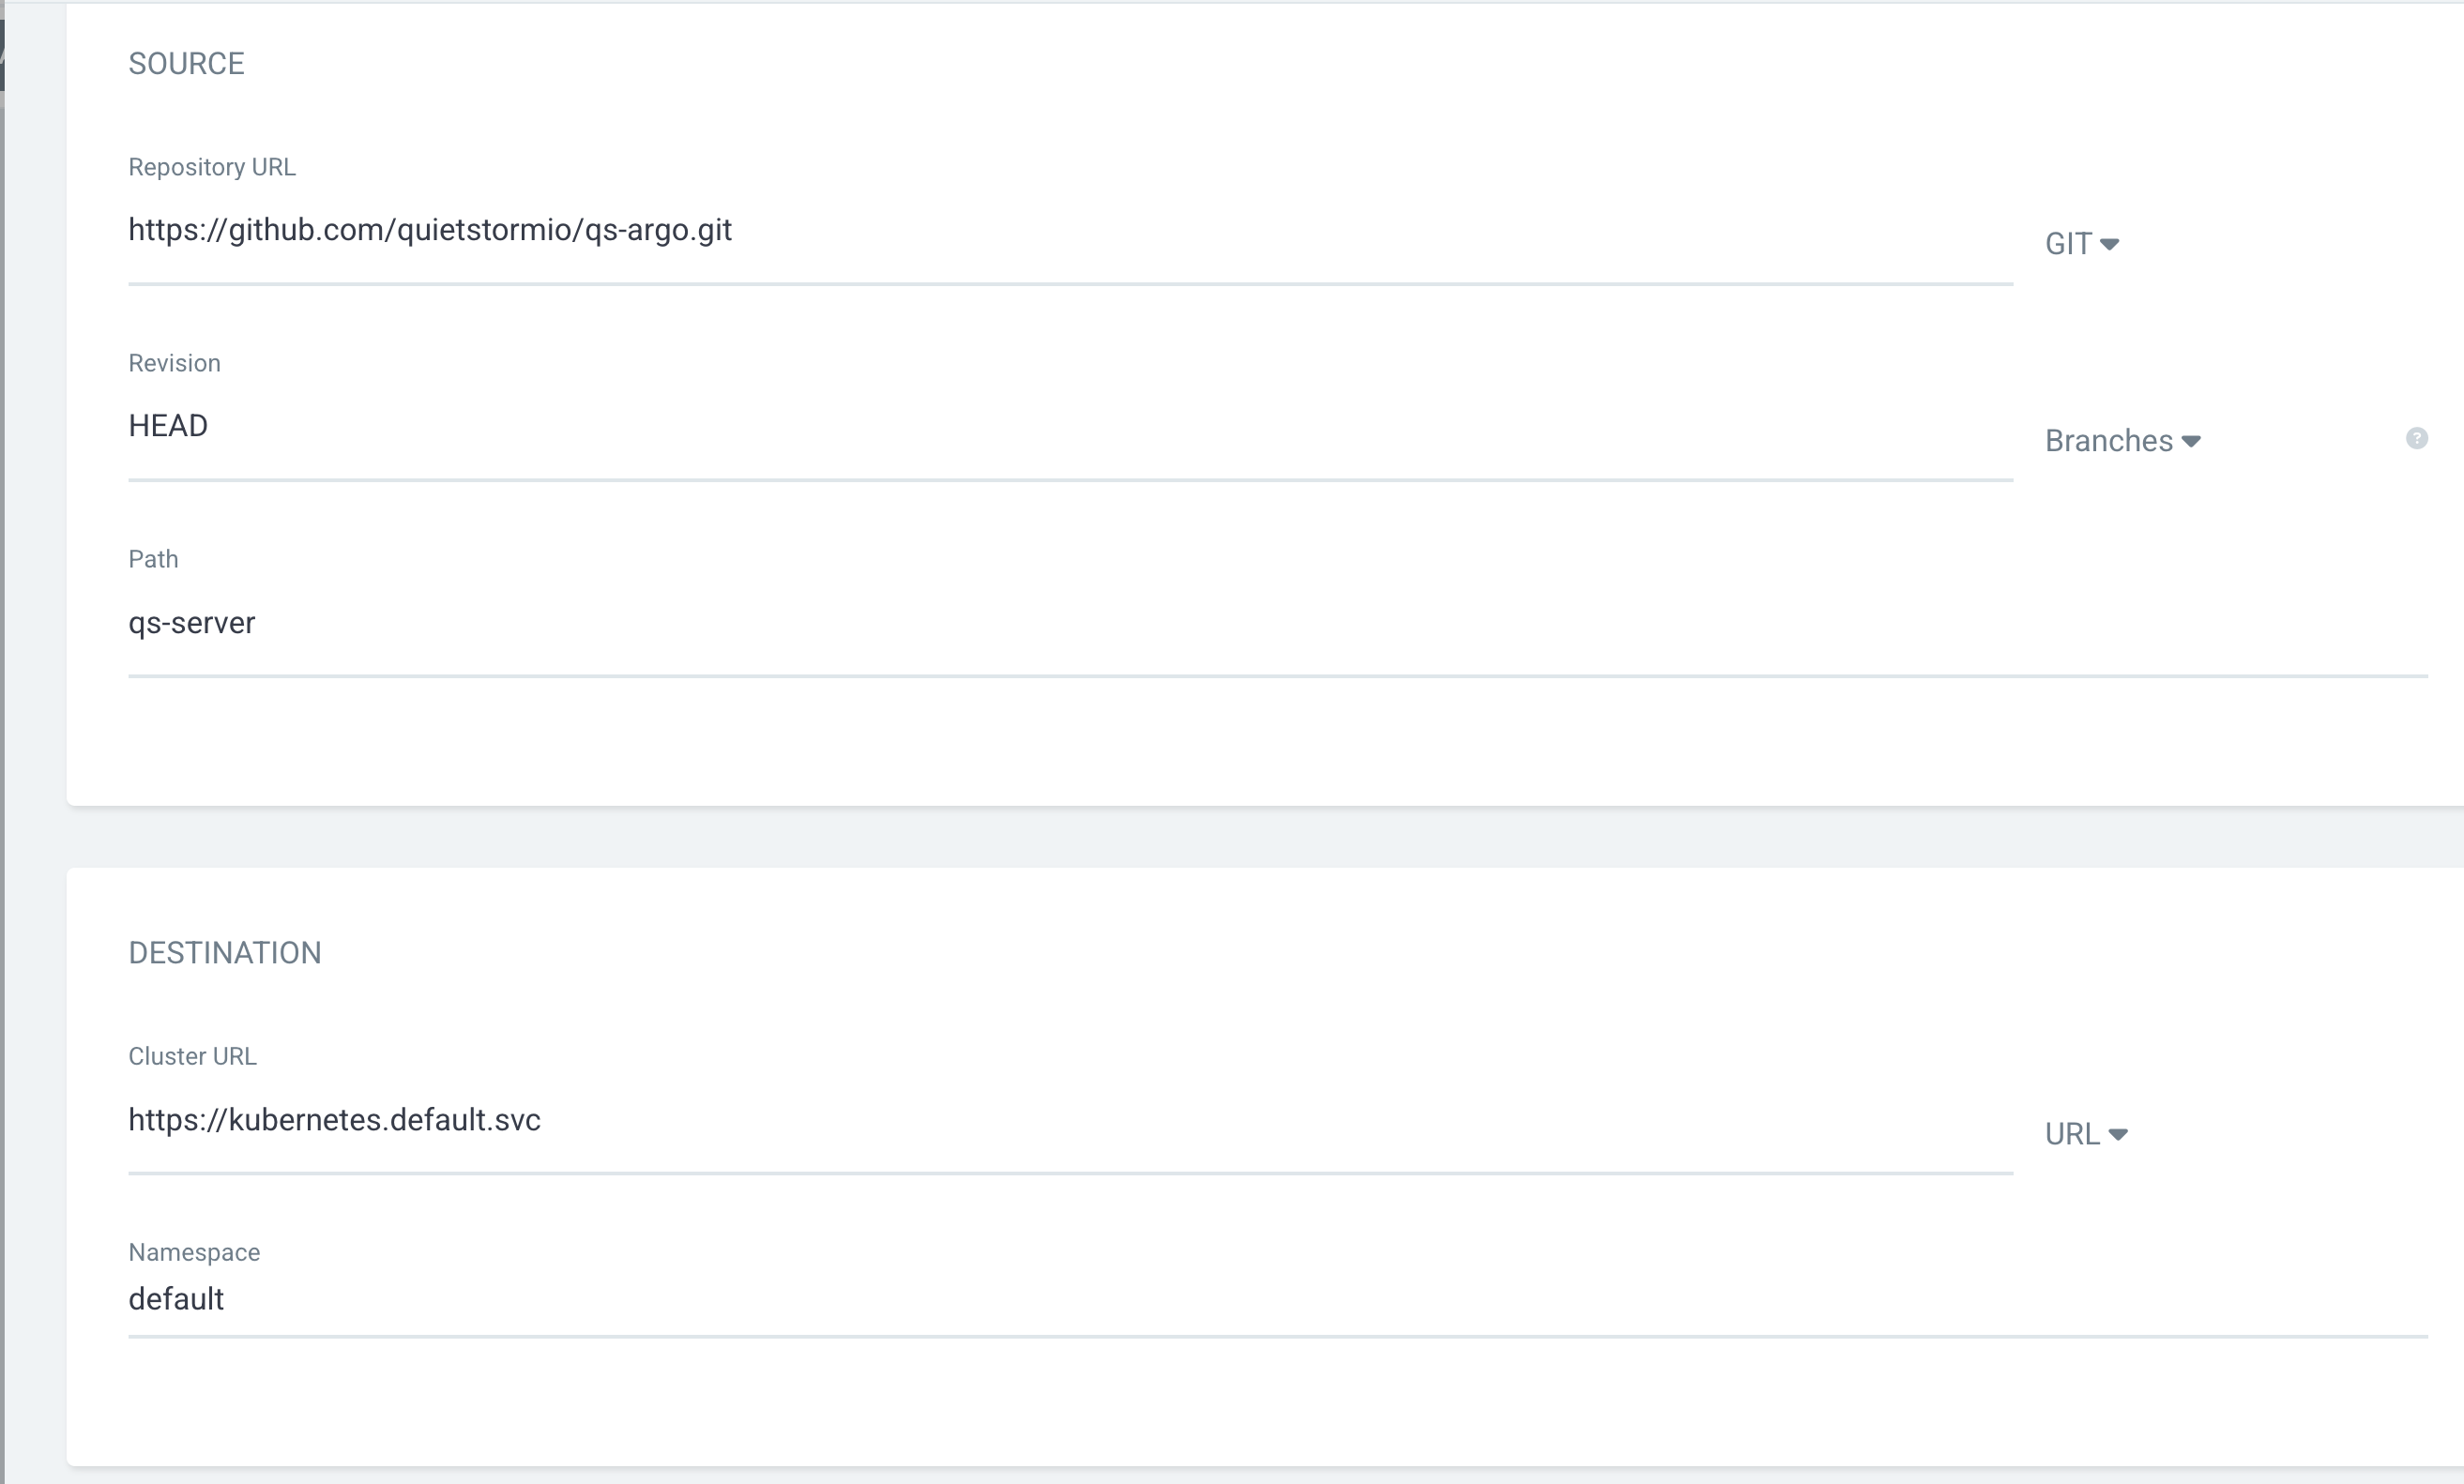
- Repository URL: The GitHub repository we created in step three above
- Revision: The branch ArgoCD is supposed to keep track of. We left the default entry HEAD
- Path: This is the path to the manifest ArgoCD is to sync. Remember I created the folder qs-server in my repo.
- Cluster URL: This is the cluster we want ArgoCD to deploy our manifests into. The entry https://kubernetes.default.svc like we have above is valid, saying that ArgoCD will deploy what it's keeping track of in the same cluster ArgoCD is deployed in. We deployed ArgoCD into our local k3d cluster, we want our nginx Deployment in the same k3d cluster.
- Namespace: Kubernetes namespace we want to deploy our Deployment/Pods.
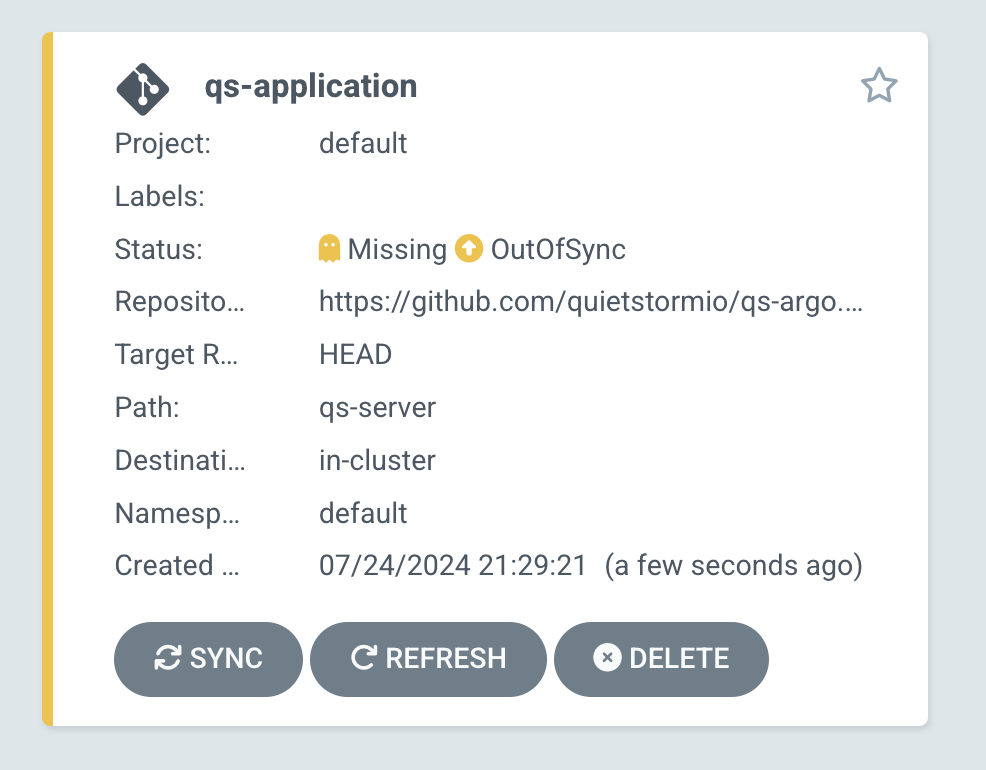
You'll then select the Create button. Once created, the application will show Out Of Sync because we just created it. What's in the cluster at this point (nothing, no nginx pods) is not what's in GitHub.

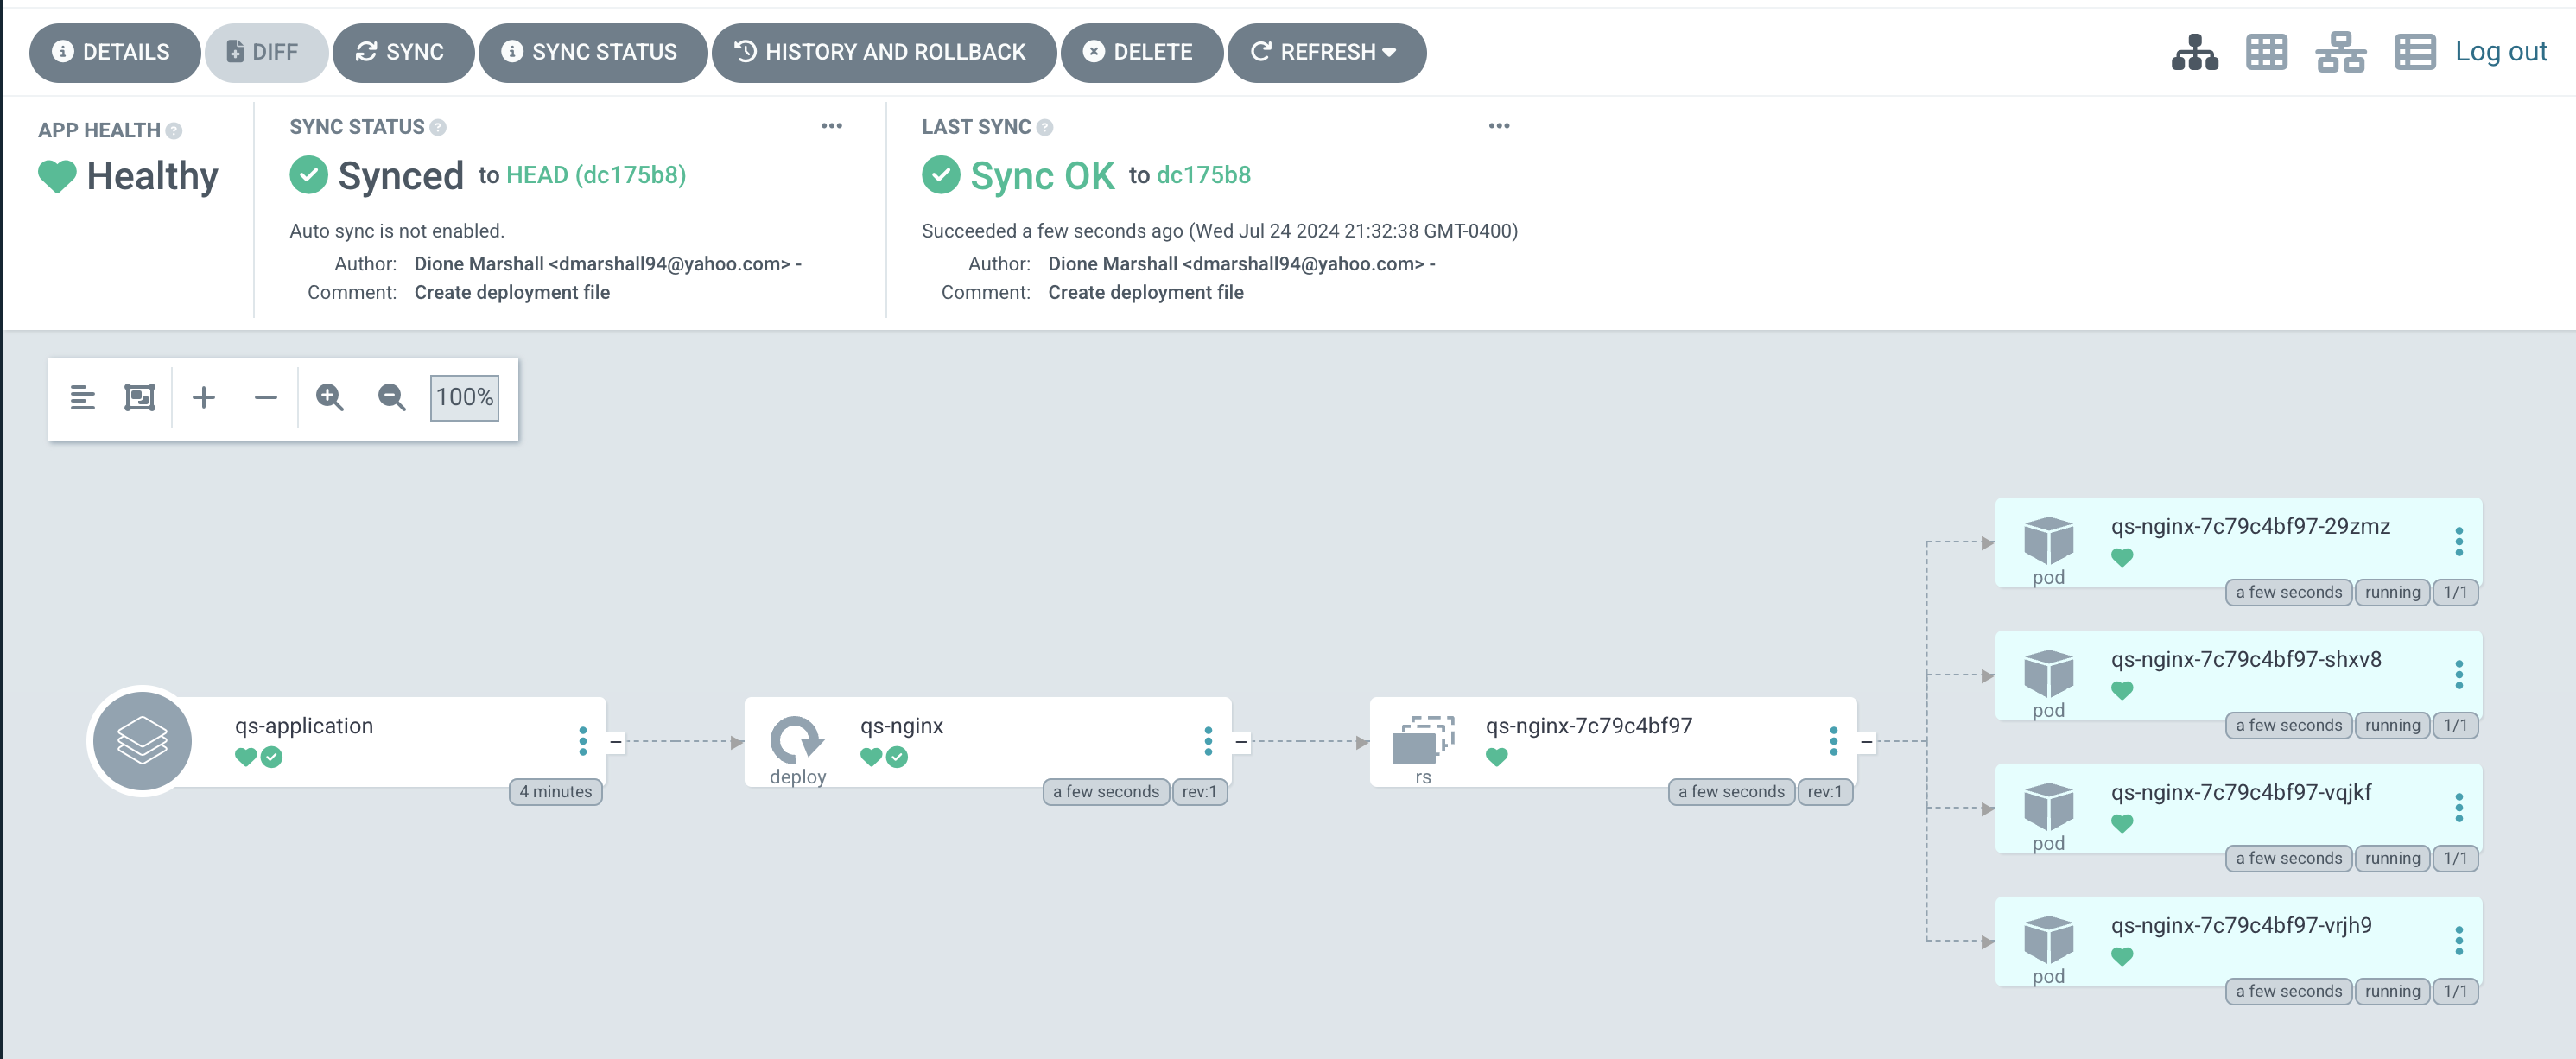
Select the Sync button and its status will become Synced and green.
5. Make edits and sync
Now in our scenario, we want to decrease the number of pods from five to four.
You could make the change from your local machine but it's easier to do it right in the GitHub UI. Edit the file in GitHub, decreasing the number of replicas by 1. Commit, Push, Merge the changes and it should now look like this:
apiVersion: apps/v1
kind: Deployment
metadata:
  name: qs-nginx
  labels:
    app: nginx
spec:
  replicas: 4
  selector:
    matchLabels:
      app: nginx
  template:
    metadata:
      labels:
        app: nginx
    spec:
      containers:
      - name: nginx
        image: nginx:latest
        ports:
        - containerPort: 80
You'll notice after a Refresh in ArgoCD that the application is back to Out Of Sync, why is that?
It's because what's in the cluster is 5 pods and the Deployment has 5 replicas, but the Deployment file in GitHub has 4.
Sync the application and you should see your cluster remove one of the pods and Argo should be back Synced and green.

Moving Forward
ArgoCD provides huge value when it comes to platform engineering and makes life easy by keeping all the teams code in one place.
Leveraging the "power of the cluster" not only can we make simple changes like we did in this guide, it's real power is when we integrate with other tools such as Crossplane and Helm where Syncs can edit infrastructure such as AWS EC2 instances. We connect the two tools in coming articles.
If it can be managed/defined in a Kubernetes cluster, ArgoCD will do the heavy lifting and deploy what's there to a cluster of our choosing!
