Alerting and Notification with SES, Lambda ,and CloudWatch

A major part of platform engineering is notifications. It's used to alerts users on changes and things that they may want to receives updates. This could be metrics using Prometheus, failed pods in a cluster, or in this case new resources in our cloud environment. This information is relevant to users and in some cases critical in order for the team to react in a timely manner. Platform teams should aim to have notifications in real time for whatever event they're notified about and matters to them. Observability and notification also benefits the team by reducing cognitive load.
The Interaction Design Foundations definition of Cognitive Load:
"Cognitive load refers to the amount of effort that is exerted or required while reasoning and thinking. Any mental process, from memory to perception to language, creates a cognitive load because it requires energy and effort. When cognitive load is high, thought processes are potentially interfered with."
Users of a platform should be empowered to stay within their area of expertise and not have to worry about monitoring environments and resources. Monitoring can and should be automated in order for developers to react to events when notified, instead of spending cognitive load on details they don't care about.
With this in mind, our guide today will give a foundational architecture to enabling notification with custom emails sent with AWS SES, assisted by Lambda, and is notifying users on CloudWatch events.
In other words, we're going to send an email to a user when an EC2 instance they've deployed is in the Ready state. This could be from a newly created instance or one that's been started after being shut off. This will provide insight to the potential of CloudWatch alerting and monitoring while SES is able to notify. The thought is that users shouldn't have to navigate through the console, or use the AWS CLI in order to get pertinent data about a cloud resource. However the object was deployed, (Crossplane and Kubernetes, console, terminal application) developers will be able to complete other tasks until the resource they need is ready, they've been notified with the data they care about.
Prerequisites
To complete this tutorial, you'll need the following:
- An AWS account with privileges to create roles and other resources
- A domain that you own. SES seems to only work with a custom domain that have the ability to add DNS records
- Golang installed
We are not responsible for any charges you may incur following this guide.
Configure SES
SES is an AWS service that enables users to send and receive emails from domains that they own. It's use cases are vast with most being for mass email communication such as marketing emails and newsletters correspondence to a distribution list. This doesn't really fit our use for the service but let me explain. As platform engineers, we're focused on user experience. I want our developers to get pertinent details about the running instance such as IP and in our case it's ID. My experience with SNS entailed emails that contain unnecessary JSON about the event. I'm sure with a little digging we could have figured it out but found SES much more of a fit for what we're trying to do. The service also allows us to send emails from a custom, trusted domain as opposed to users becoming a part of a topic.
When designing this tutorial we originally wanted to use SNS but couldn't find much documentation (especially from AWS) on customizing the email body. With the Golang AWS SDK, this became as simple as declaring variables that contained HTML as you'll see in the next step.
In order to get started with SES, you'll need a custom domain that you own. You won't be able to use your @gmail or @yahoo. As long as this is true, continue on by following this documentation and once you're fully onboarded to the service move to the next step.
Create Lambda Function
First thing we need to do is create our Lambda function. The function for this tutorial was written in Golang and uses the AWS SDK for Go. It will receive the Lambda event triggered by the CloudWatch rule we'll create in the next step, process and extract the data then sends an email using SES. Lambda events are JSON-formatted data that triggers the function to run. In our sample code, the event parameter grabs details such as the InstanceID and State that will make up the email body sent to the user.
When writing the code for the function, I questioned how would someone knows what data ] the Lambda event (CloudWatch rule) is sending to the function. It's documented here and we can grab what we want from the event.
Our function needs permission to interact with SES and Cloud. For this we created a service role named QS-Lambda-Role. To keep it simple, the service role we created was given AWS managed policies AmazonSESFullAccess and CloudWatchFullAccess (use these at your own discretion). If you already have a user with the proper permission use it, if not use the following instructions:
- Open the IAM Dashboard in the AWS Console
- Select Roles from the menu
- Create role
- Ensure AWS service is selected in Trusted entity type
- In the Use case dropdown, select Lambda
- Select Next
- Add AWS managed policies AmazonSESFullAccess and CloudWatchFullAccess
- Name it whatever you want and then create the role
Let's now prepare the Lambda function. Complete the following:
- Clone the function from our Github repo here
- Run a "go get ." command to install the external AWS packages
- The code has variables (fromAddress, toAddress) that need to be edited with actual values before we compile. In the main.go file, they are on lines 37 and 39 respectively. Fill in fromAddress string with the email address from your custom domain (the one you enrolled into SES in the step above) and the toAddress string with an email that you want to send the email to.
- Once the code is clean and ready to go, use the following command to build our executable. This tutorial was created on my Macbook and we decided to use arm64 for the architecture.
GOOS=linux GOARCH=arm64 go build -o bootstrap main.go- Next create a zip folder that holds the executable to be uploaded to Lambda. It's worth noting that we named the executable "bootstrap" in the previous step because when we upload with a zip file, it must be named bootstrap. More details on this here.
zip function.zip bootstrap
Now that we have our zip file, we can upload it to Lambda:
- Go to the Lambda service in the AWS console
- Select Create function
- Enter details
- Name: Whatever you want
- Runtime: Amazon Linux 2023
- Architecture: arm64
- Change default execution role: Use the QS-Lambda-Role created earlier.
- Then select Create function
- On the next screen should be your function, select Upload from and select the zip file created earlier
Now that we've enrolled into SES, and our Lambda function we're almost ready for a test. Last thing we need to do is create the CloudWatch rule that sends data to our function.
Create CloudWatch Rule
In this final step we're going to create our CloudWatch rule. The rule we're going to create is quite open, keeping track of when any EC2 instance goes into the Running state. Use this guide from AWS if you've never created a CloudWatch rule but the event pattern for this tutorial is below:
{
  "source": ["aws.ec2"],
  "detail-type": ["EC2 Instance in Running State"],
  "detail": {
    "state": ["running"]
  }
}
When you get to the Target section of the rule, point it to the Lambda function you created in the previous step.
Test Email
If you've made it this far congrats! We've deployed and configured everything needed to get custom emails when an instance is in the Running state. Hopefully your environment doesn't have too many resources that are constantly being shut down and powered back on because you might have already received an email.
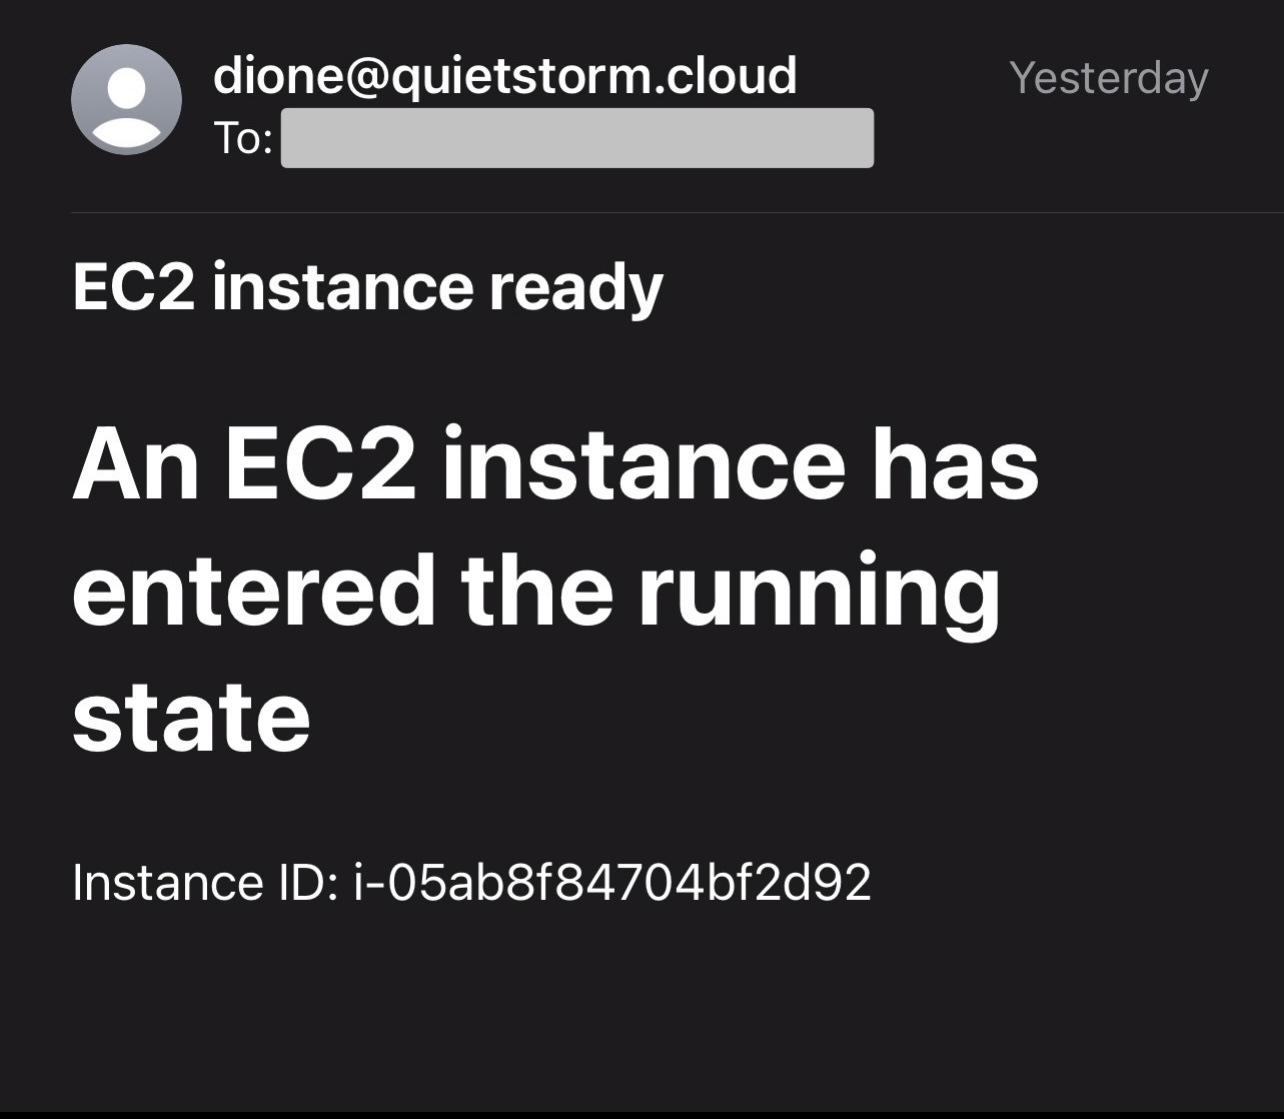
To trigger our CloudWatch rule we're going to create an instance or start an instance that was shutdown. Remember, our CloudWatch rule is just looking for when an instance is in the Ready state. Choose one of these method to test our work and after few seconds, check the email that you configured in the toAddress variable in the Go function. You should see something similar to this screenshot:

If not, troubleshoot the following:
- Ensure you cloned, compiled, and zipped the Golang function properly
- Ensure the role you used has the proper permission to interact with CloudWatch and SES
- Ensure you've FULLY enrolled your custom domain, completing everything in the Completed tasks section of the SES Dashboard
- If all else fails, email me personally dione@quietstorm.io and I'll troubleshoot with you
